A few days ago I discovered Mole, an open-source tool created by the good tw93, who has several well-known repositories, including Pake.
It’s a simple, free, open-source alternative for cleaning/optimizing your Mac, aimed at people who are more comfortable “tweaking things,” since you have to use the terminal—and that tends to put off a lot of general users.
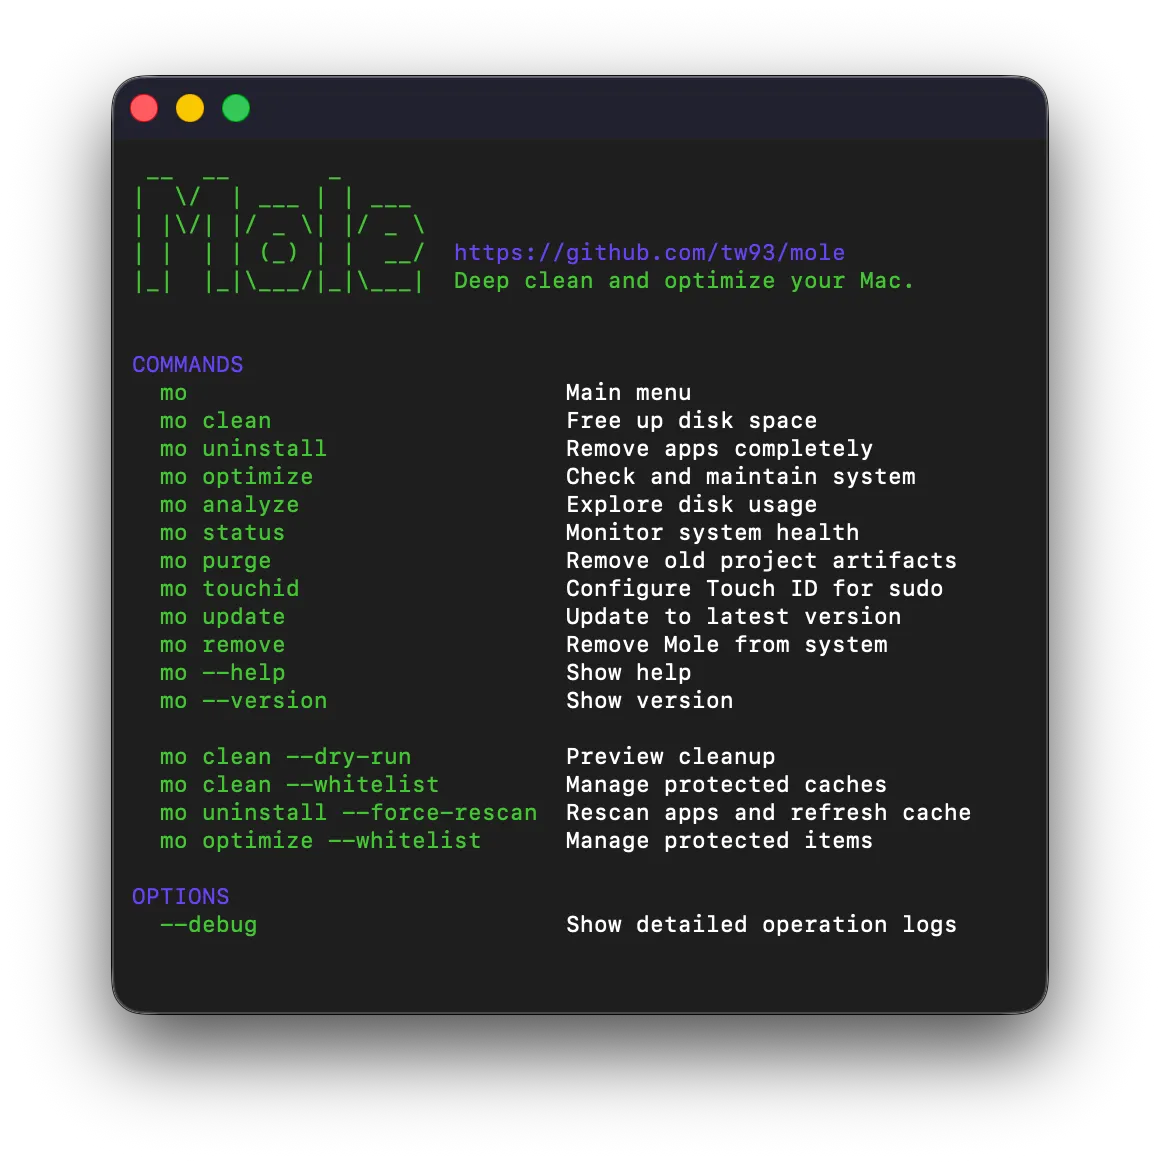
All of its functions and features are in the creator’s README, so I’m only going to focus on what caught my attention:
1) Safety and configuration
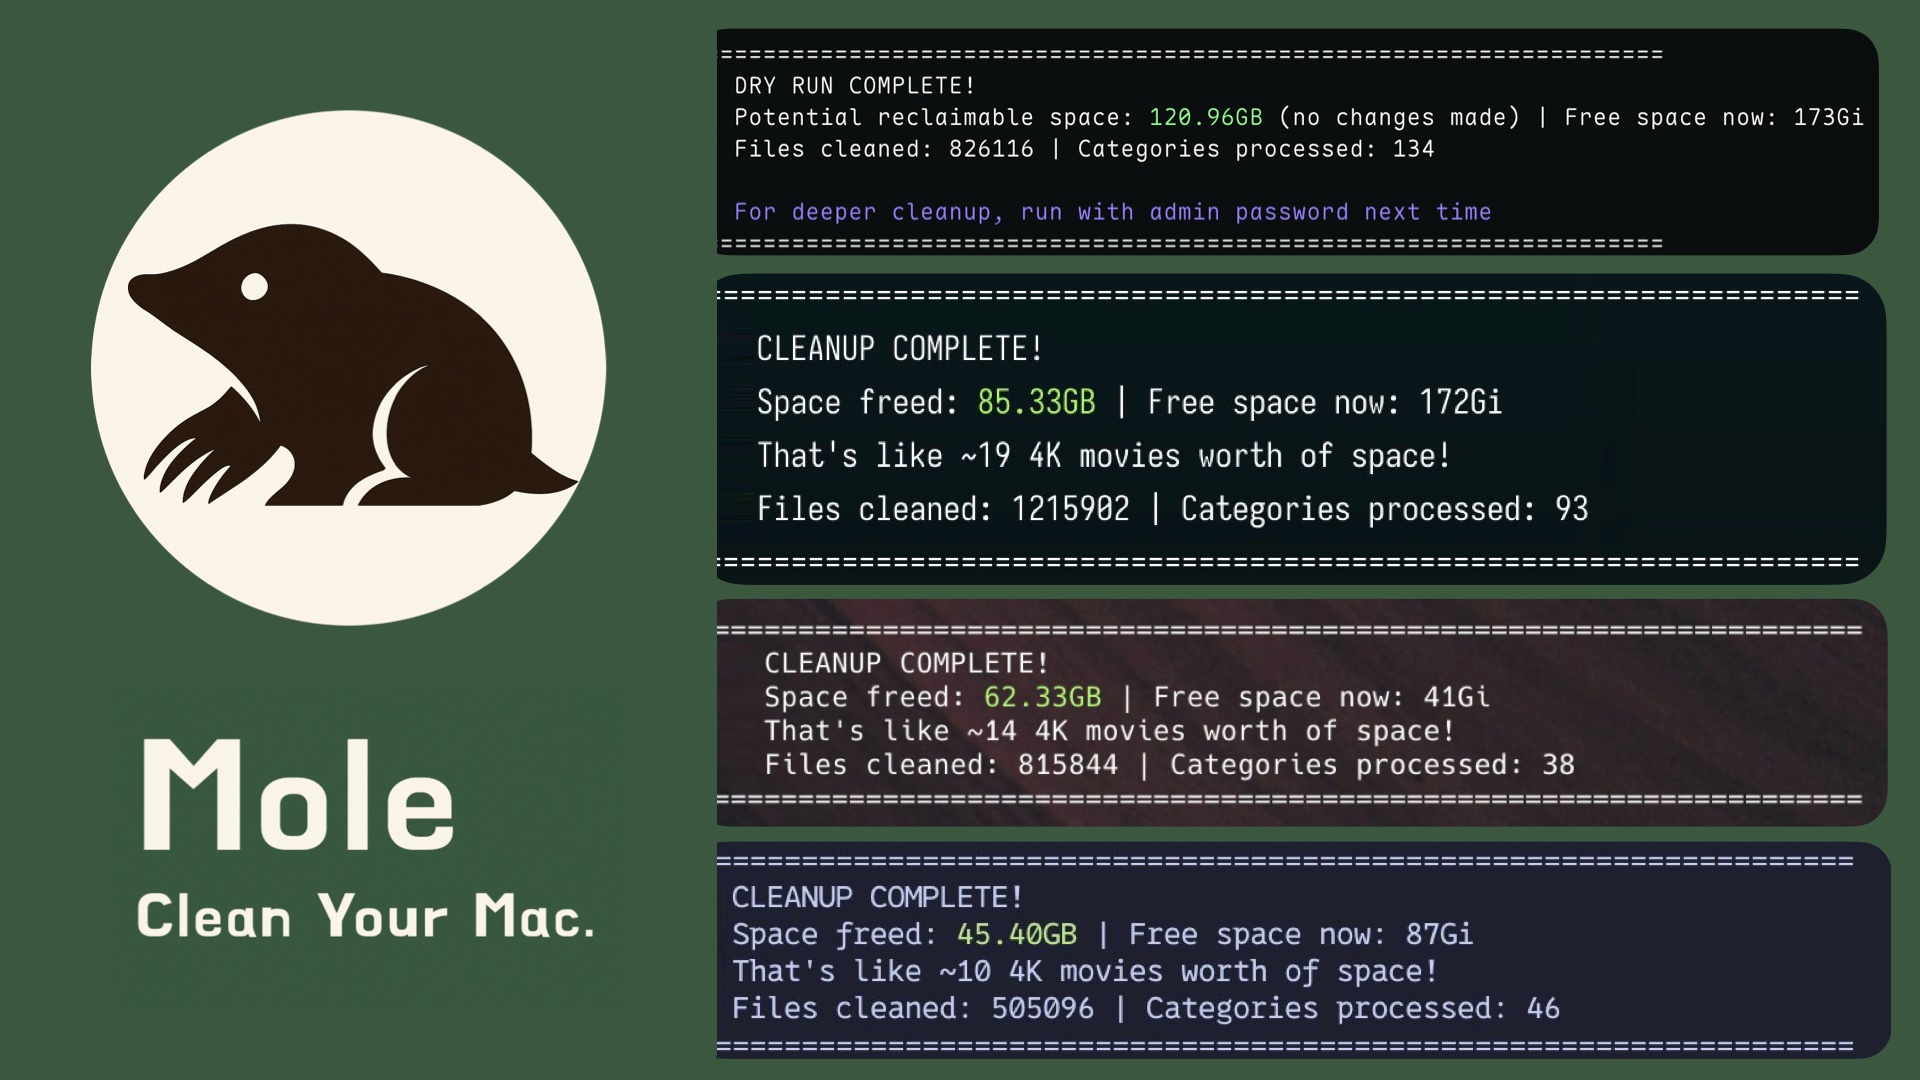
Before doing anything, it gives you the option to check whether what it’s going to delete makes sense to you or not:
dry-runto preview before deletingdebugfor diagnosticswhitelistto exclude things you don’t want it to touch
The best flow I see for a standard cleanup: first -dry-run and then mo clean
2) App uninstaller
Better than the typical thing Apple recommends (drag the app to the trash and empty it), since it doesn’t just delete the app: it also targets caches, prefs, launch agents… all the leftovers apps leave behind.
3) Permissions and privileges
You have to be careful here. It’s true that it’s a solid project and you assume it works correctly, plus it’s open source—but a cleaner can really mess things up, and it also needs a lot of permissions and access.
Since it runs from the terminal, it requests various system permissions in order to scan and clean certain protected locations. I haven’t found much information about exactly which total permissions it needs and all the reasons, but I’ve gathered the ones it asked me for and why I think it needs them:
Access to protected folders
The disk analysis feature allows it to browse space usage in user directories (for example, Documents, Desktop, etc.) to show how much space files take up or to delete them manually.
Access to iCloud Drive / Apple Music
It cleans caches associated with iCloud. Specifically, it deletes temporary files from the CloudDocs service and the iCloud bird daemon. It also includes Apple Music’s cache in its cleanup—for example, cover/album caches or other temporary data the app stores on your system.
Access to app data
This permission is a bit vague, but I think it asks for it because Mole looks for installed applications to uninstall them along with their leftovers. To do that, it scans the typical app paths, including /Applications and ~/Applications (global and per-user), as well as Homebrew paths or projects.
Access to System Events (Automation)
It uses AppleScript (via System Events) for certain tasks. Specifically, it queries the identifiers of running applicationsvia an AppleScript. This helps it, for example, know which apps are open before trying to uninstall them or clean their files, avoiding problems.
Personal recommendation: I would only grant permissions for access to app data and System Events, since those are the permissions that affect its functionality. The others (iCloud Drive, Apple Music, and protected folders) don’t seem especially relevant to me for its use, since they’re not places where I really want to do a cleanup or optimize things.
⚠️ NOTE: you’re not giving those permissions to Mole, but to Terminal, which means other programs that run from the terminal will have those same permissions.
Who it’s for and who it’s not for
I’d recommend it to:
- people who prefer simple tools and don’t mind not having a UI
- those who want control
I wouldn’t recommend it to:
- anyone who wants “install and done”
- anyone who doesn’t want to think about what’s being deleted
- anyone who gets overwhelmed by permissions or by TUI/CLI-type tools
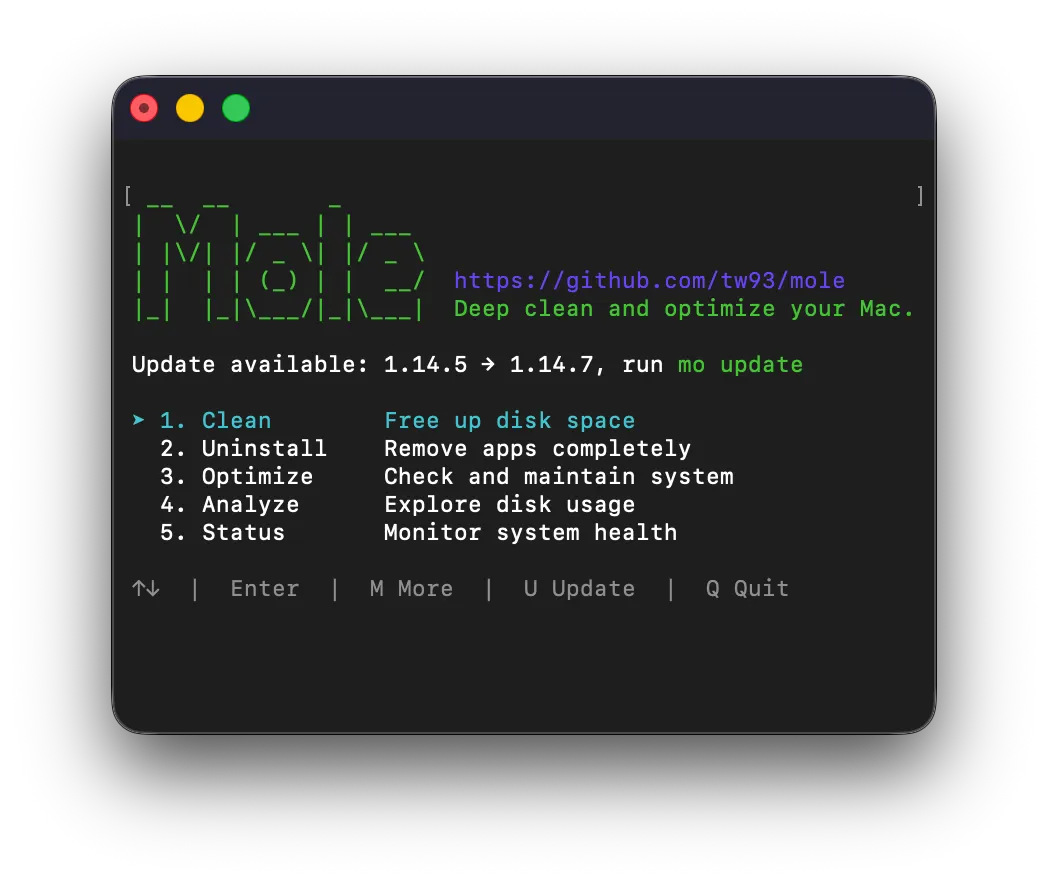
For now, I’m mainly going to use it to uninstall apps and as a complementary tool—not something to use every day, but for when I want a cleanup from time to time. I’ll leave the installation now and a few screenshots of what the TUI looks like and its features.
Quick install (if you want to try it)
It’s not installed via the App Store or a typical installer, but directly via curl, or—my preferred option—via Homebrew:
brew install tw93/tap/mole
Once installed, you can open its TUI with: mole / mol
You can see the commands with: mo —help